Total home makeover – in
progress……
Making what I have into what
I want - starting with the kitchen
**note - please bear with me on my blog appearance I am new to this and as I become familiar with all the design and formatting I will work to make it look better.
Hi – this is my first post to
my first blog. I hope you find it interesting. Many of my subsequent blogs will
be a continuation of my total home make over.
Sometimes we can’t just buy
our dream homes already made. Sometimes we can make our dreams come true –
sometimes we have to modify and re-dream to mesh with our reality. Sometimes we need to beautify our ‘in the
mean time while we wait’. This post and
its related posts are all about making what I have into what I want.
Some things ‘I can do it
myself” other things I call in the professionals.
I am in the process of
remodeling, repairing, renovating, updating, and vintagizing (made that word up
myself – just now) our house – my mom’s and mine.
A little history: The house sits on the property that my
parents originally bought in the late 1960s. The original plot was subdivided
into three lots – two lots have since been sold, one of which included the
original house. There is a story to all
that, but not relevant to this post. The remaining plot contains our current
house and a nice sized lot that I have big plans for…
This post, however, concerns
my current ongoing process of turning our house into my dream home. It started slowly
and is now gaining momentum.
The first big DIY project for
me was to remodel (and ‘vintagize’) the kitchen. I want a farmhouse, country,
vintage feeling kitchen. The house was built in the late 1980s and
unfortunately was not done well. That time was a sad and dark time for our
family as my father passed. He was a wonderful quiet man, an excellent
carpenter full of talent and creativity.
I feel very close to him when I work on my DIY projects and often feel
he is inspiring, helping and problem solving right along side me as I work.
Step 1: Tell my mom I am
going to redo her kitchen.
That went over better than I
expected. I don’t think she really realized what I meant until I started to gut
the cabinets.

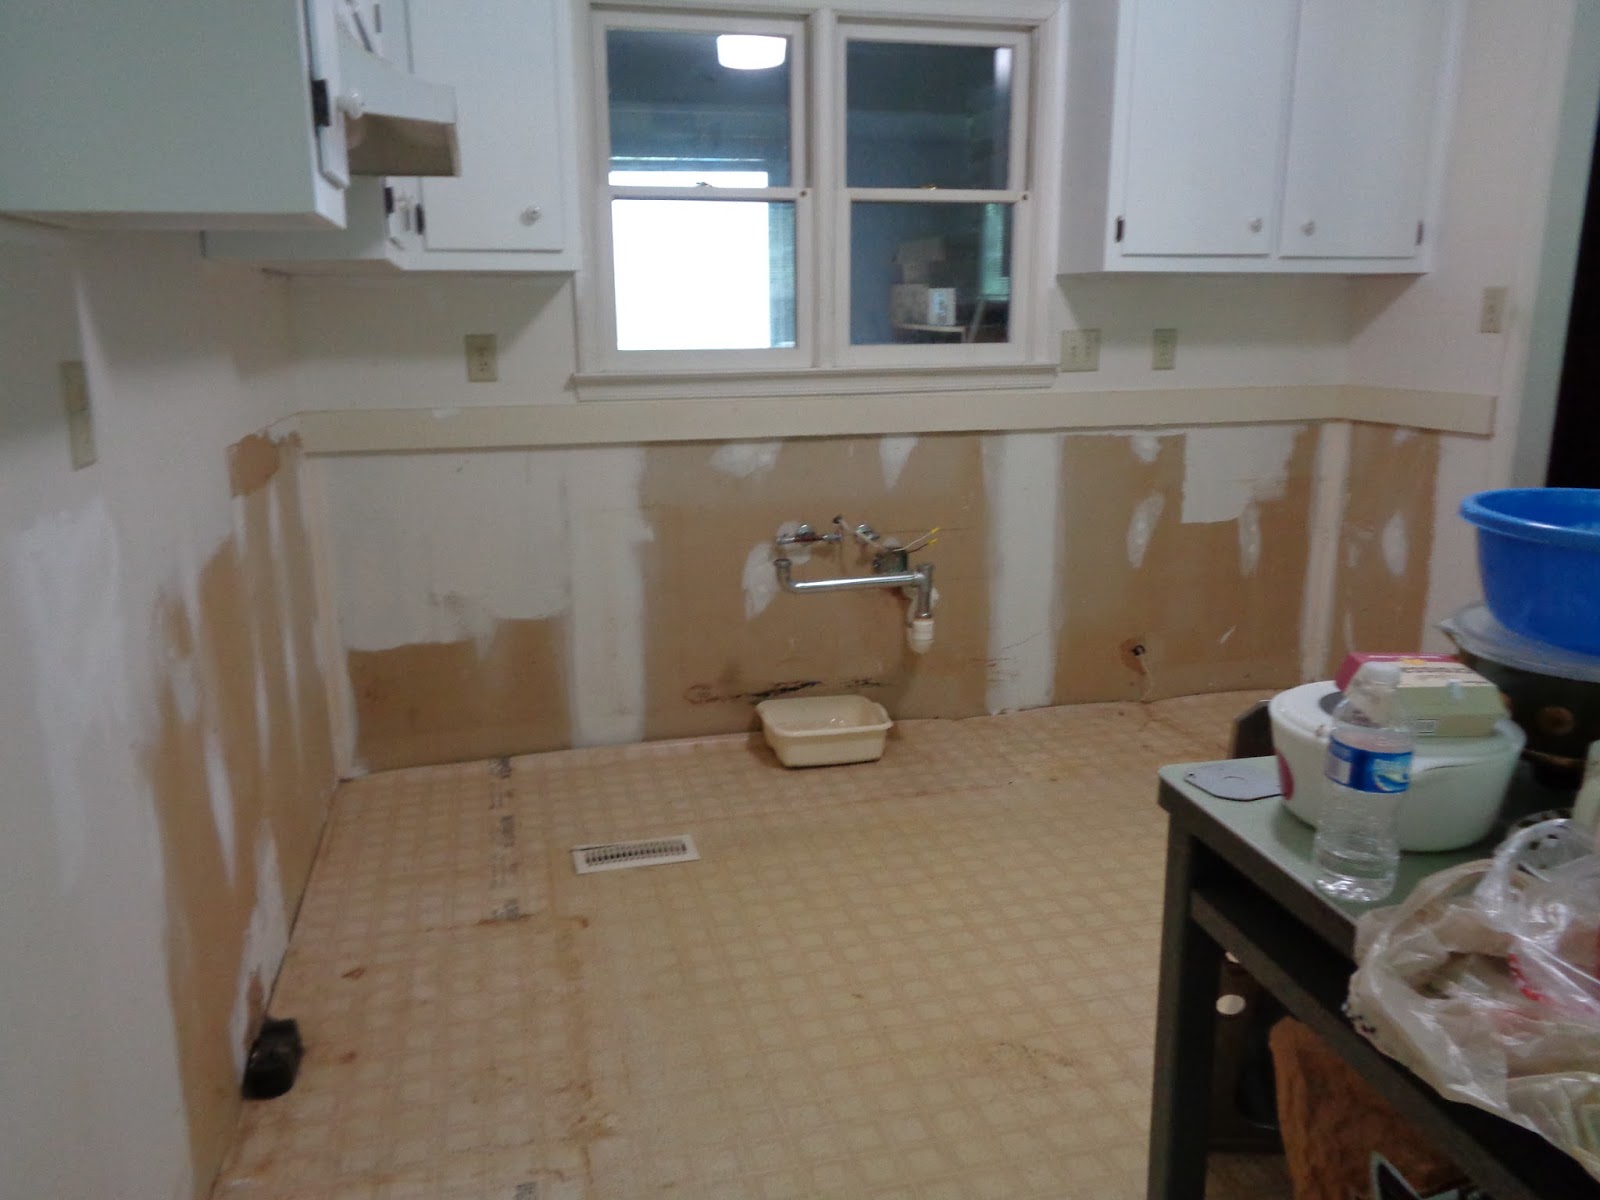
Step 2: Gut the kitchen. The
kitchen was your basic 1980s wall of top cabinets and bottom cabinets with a
dishwasher, stove and fridge. . Unfortunately I don’t have any good before
pictures as I started to demolish before I thought to take pictures.

This kitchen is also big and
has a wall of three windows
I was moving everything out
of the kitchen so things look really cluttered and messy.


I kept the top cabinets in
and painted them white. I plan to replace the door knobs. I think changing to
white made an instant improvement. Made them look clean, fresh and a bit more elegant.
I love wood cabinets, but whoever the builder had stain them, did an awful job.

One of the main instigating
forces that propelled me to jump in and do this remodel at this time is that
there was damage to the floor that had been repaired. Note the door – this leads to the garage. In
a future post I will show the new door that ended up replacing this one, and, the
entire remodel that is going to happen behind that door.


I like sunny county,
farmhouse style kitchens so I decided to paint three walls yellow to define the
‘kitchen’ area of the room and I am keeping the window wall white. I did this
mainly because it kind of defines the eating area and also because it maintains
the smooth flow into the dinning and living rooms. I chose yellow because it is sunny and allows
the white cabinets to stand out, and I like yellow. I know - same picture, but
it shows both points.


I am a single mom who works
as a special education teacher so out of necessity I need to be very budget
conscience when taking on projects. I went about choosing flooring that: 1) I
could install myself 2) was cheap and 3) looked as good as possible based on
what I could afford. I really wanted the expensive real wood light oak
flooring. But this flooring was on clearance, very cheap, and actually the
color turned out to be better than I thought it would and I think looks better
than my first choice. You can see from the pictures how this change instantly
gave the kitchen a warm cozy feeling. I really loved how it turned out. Note
the window between the cabinets. That will be changed out for a single window,
because behind that window another remodel will be taking place.
I think the warm wood floor
with the yellow walls and white cabinets is a great start to making this my
dream kitchen. I have since also put in register vents that match the flooring
in color and material.
Next post – what to put in?
What to put in to create the kitchen that has everything I want? I think I’ll start with cabinets and see what
treasures are in the storage unit. Hint: vintage and free standing – no built-ins.